![]()
Build a Web App for your RAG Chatbot
Project Link: View Project
Author: Duc Thai
Email: ducthai060501@gmail.com
Building a RAG Chatbot with a Web Interface
Introducing Today's Project!
In this project, I will demonstrate building a web app with my very own RAG chatbot inside. I already have the knowledge base, data source, and API set up, so now I just need to create the web interface. I’m doing this project to learn how to connect all these components together, and to gain practical experience in developing a user-friendly app that leverages advanced AI and retrieval-augmented generation technology.
Tools and concepts
Services I used were Amazon S3 (for storing documents), Amazon Bedrock (for connecting to and running AI models, and managing a Knowledge Base), and AWS CLI (for working directly with AWS from the command line). Key concepts I learnt include building and querying a custom Knowledge Base, using Retrieval Augmented Generation (RAG) to combine document search with AI model responses, handling API requests with FastAPI, managing environment variables for configuration, debugging with logging, formatting and parsing JSON for model interactions, and designing web app frontends that connect seamlessly with backend APIs. These gave me practical experience in creating a scalable, flexible, and user-friendly chatbot app powered by both specialized data and general AI knowledge.
Project reflection
This project took me approximately 2 hours to complete. The most challenging part was troubleshooting the integration between the frontend, backend API, and AWS Bedrock—especially making sure environment variables were correctly set and that API requests returned the expected responses. It was most rewarding to see the entire chatbot application come together: having a web interface that seamlessly connects to my custom Knowledge Base and an AI model, and being able to interact with it in real time through the browser.
I did this project today because I wanted to challenge myself and learn how to build a full-stack chatbot app using AWS Bedrock, FastAPI, and a custom Knowledge Base. My goal was to understand how retrieval augmented generation works in practice, connect all the systems together, and build a web interface that’s actually enjoyable to use. This project definitely met my goals: I got hands-on experience with new services, solved real integration problems, and ended up with a working chatbot web app that combines AI and document search in a meaningful way!
Chatbot setup
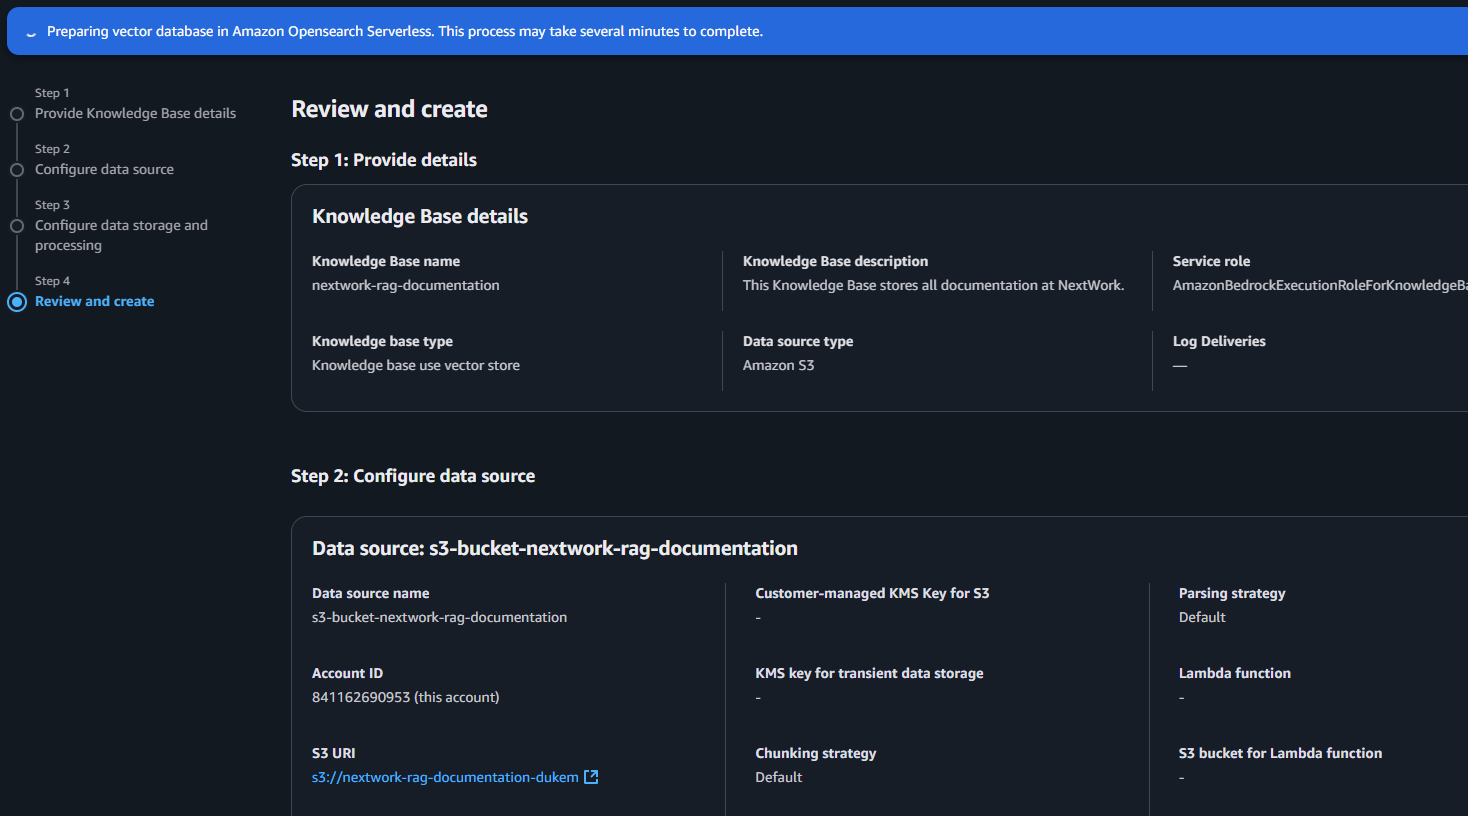
I created a Knowledge Base in Bedrock to centralize important information and make it searchable for my chatbot. This allows the chatbot to provide more accurate, relevant answers by retrieving context from my curated documents, rather than relying only on general AI knowledge. Using Bedrock ensures easy integration, security, and scalability as my data and use cases grow.
Setting Up the API
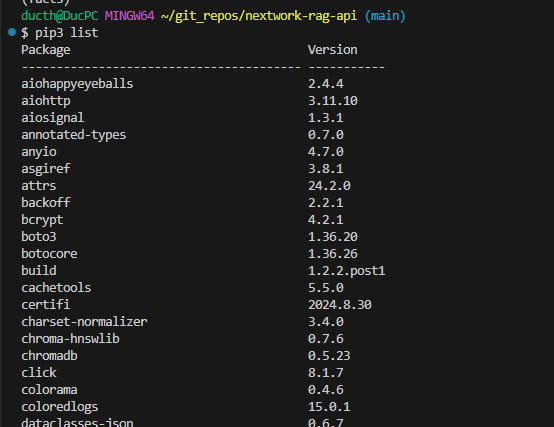
To run the API, I installed packages like boto3==1.36.20 for AWS integration, fastapi==0.115.8 for the web framework, python-dotenv==1.0.1 for loading environment variables, and uvicorn==0.34.0 as the ASGI server. I also made sure to install all dependencies listed in requirements.txt and any extra libraries required by those packages. These packages are important because they provide the tools for building, running, and connecting the API to AWS services securely, while their dependencies ensure everything works together smoothly.
A virtual environment helps me by creating an isolated space for my project’s Python packages and dependencies. This prevents conflicts with system-wide packages and other projects, ensuring that the exact versions I need don’t interfere with existing software on my computer. For this project, using a virtual environment makes it easy to install API-related libraries (like FastAPI, boto3, and uvicorn) without risking compatibility issues, and it keeps my workspace clean and organized.
Breaking down the API
In our web app, we need an API because an API is like a menu for applications—it lists all the ways other software can interact with my service. The API I’m creating will define how any app can connect to my chatbot, not just through the command line. I want my chatbot to be accessible via attractive web interfaces, mobile apps, and platforms like Slack or Microsoft Teams. Building an API unlocks endless possibilities: you can create sleek interfaces, add it to other apps, or integrate with messaging tools, making the chatbot truly versatile and useful in any context.
My API uses the Python AWS SDK (boto3) to connect programmatically to AWS services like Bedrock and manage resources directly from the application code. The difference between the AWS CLI and an SDK is that the AWS CLI is a command-line tool for manually running commands and scripts to interact with AWS, while an SDK is a programming library that lets you control AWS services directly within your code. With an SDK, your application can automate complex tasks, integrate AWS features, and handle errors and responses in real-time—something you can’t do with just the CLI.
Testing the API
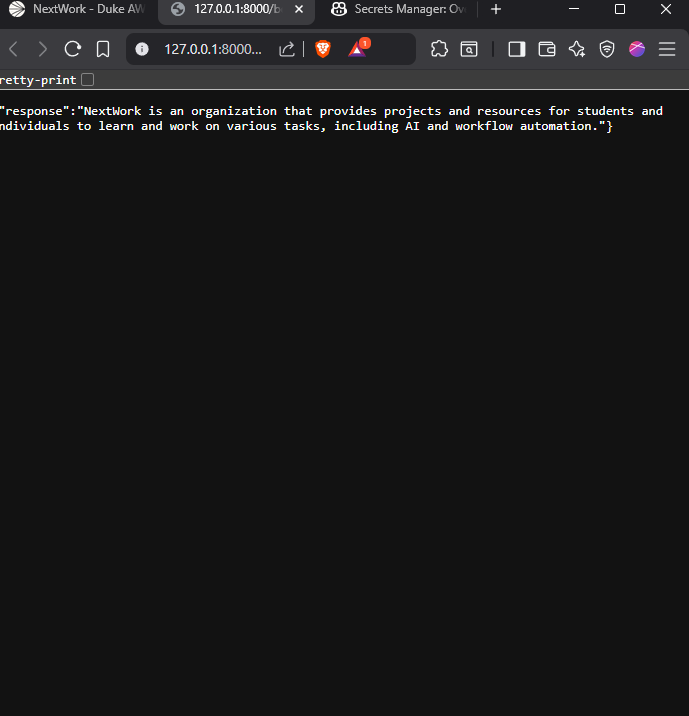
When I visited the root endpoint, I saw the welcome message {"message":"Welcome to your RAG chatbot API!"}. This confirms that my API is running correctly, and external applications can connect to it. It’s a quick way to verify my setup and ensures the API is ready to accept requests from clients.

Troubleshooting the API
My second endpoint had errors!
To resolve the error in my query endpoint, I need to make sure these variables are correctly set and loaded in my environment before running the API.
Running the Web App
The difference between the API and the web app for the user is that the API offers backend endpoints for programmatic access, allowing other applications or scripts to send questions and receive answers from the chatbot by making HTTP requests. The web app, on the other hand, provides a user-friendly graphical interface in the browser, enabling users to interact directly with the chatbot, see responses instantly, and enjoy an engaging chat experience without needing any coding knowledge.
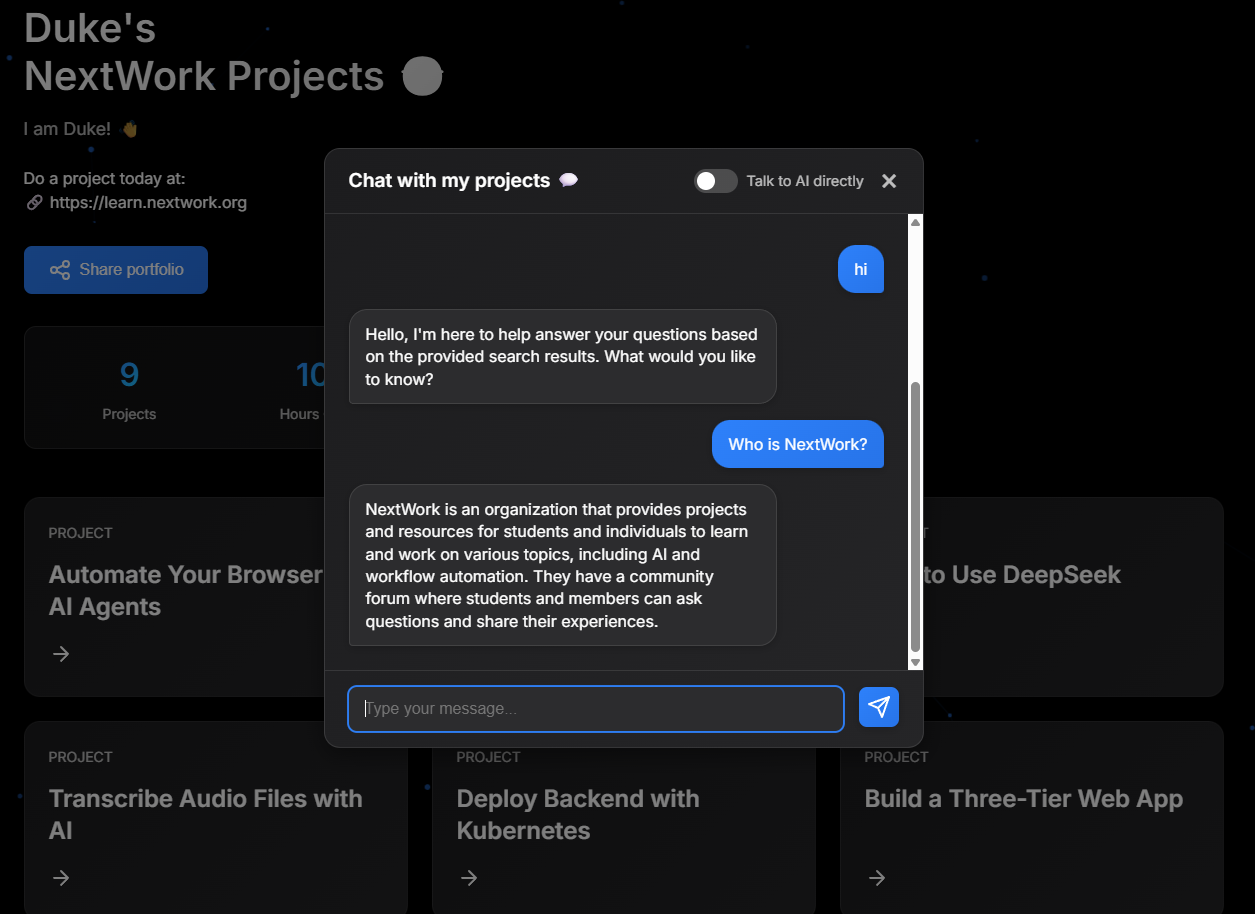
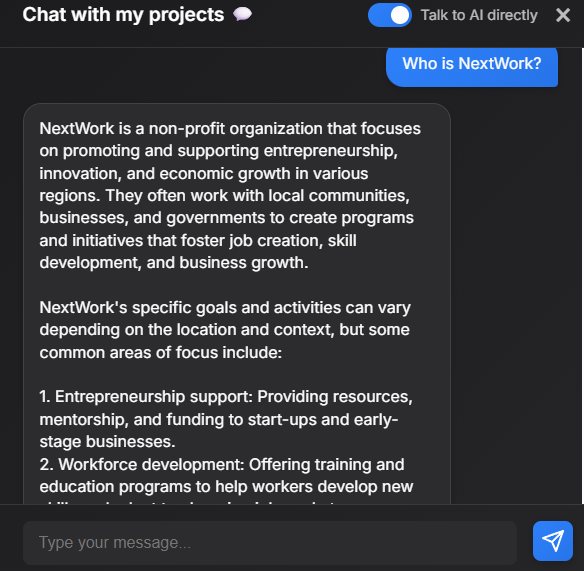
The web app has the ability to switch between talk to AI directly and retrieval-augmented mode using my Knowledge Base. When I asked the same question "What is NextWork," with the Talk to AI directly option, it gave me an answer that's a little less accurate and less specific compared to my documents. That's because the chatbot is now using the AI model's general knowledge, without referencing my custom Knowledge Base! This new functionality is great for getting general answers quickly, but if I want precise, document-based responses, I can easily switch back to RAG mode. This makes my chatbot more versatile and interactive for different types of queries.
Breaking down the Web App
When you open the chat in your browser, FastAPI serves the index.html template.
The JavaScript code in index.html handles your chat interactions.
When you send a message, JavaScript makes an API call to /bedrock/query.
The API (powered by web_app.py) processes your message using Bedrock.
The response comes back and JavaScript displays it in your chat window.
When a user sends a chat message, the frontend sends the text to the backend API, which connects to Bedrock to retrieve an answer from the knowledge base. The response is sent back as JSON, and the frontend updates the chat interface so you see the answer instantly—all working together for a smooth chatbot experience.
web_app.py extends the API by adding more tools and features for a web interface:
- More tools imported:
from fastapi.responses import HTMLResponse: For serving HTML responses.from fastapi.staticfiles import StaticFiles: For serving static files like CSS and JavaScript.from fastapi.templating import Jinja2Templates: For using Jinja2 templates to render HTML.import logging: For logging application events.
- Setup:
- web_app.py includes additional setup for logging to help track what's happening in the app—like having a security camera that records all activity. This is useful for debugging and monitoring the application.
- Static files and templates:
- web_app.py also adds code to serve static files (CSS, JavaScript) and HTML templates:
app.mount("/static", StaticFiles(directory="static"), name="static"): Tells FastAPI to serve static files from thestaticdirectory.- `templates = Jinja2Templates Initializes Jinja2.
- web_app.py also adds code to serve static files (CSS, JavaScript) and HTML templates:
Customizing the Frontend
I want to experiment with customizing the frontend because it allows me to create a more engaging, user-friendly, and visually appealing experience for people interacting with my chatbot. Personalizing the look and feel of the web app makes it easier to use and can better reflect the branding or style of my project. This is possible because as long as the API endpoints stay the same, I can freely update the HTML, CSS, and JavaScript to change layouts, add features, and improve usability—without breaking the connection to the backend chatbot logic.
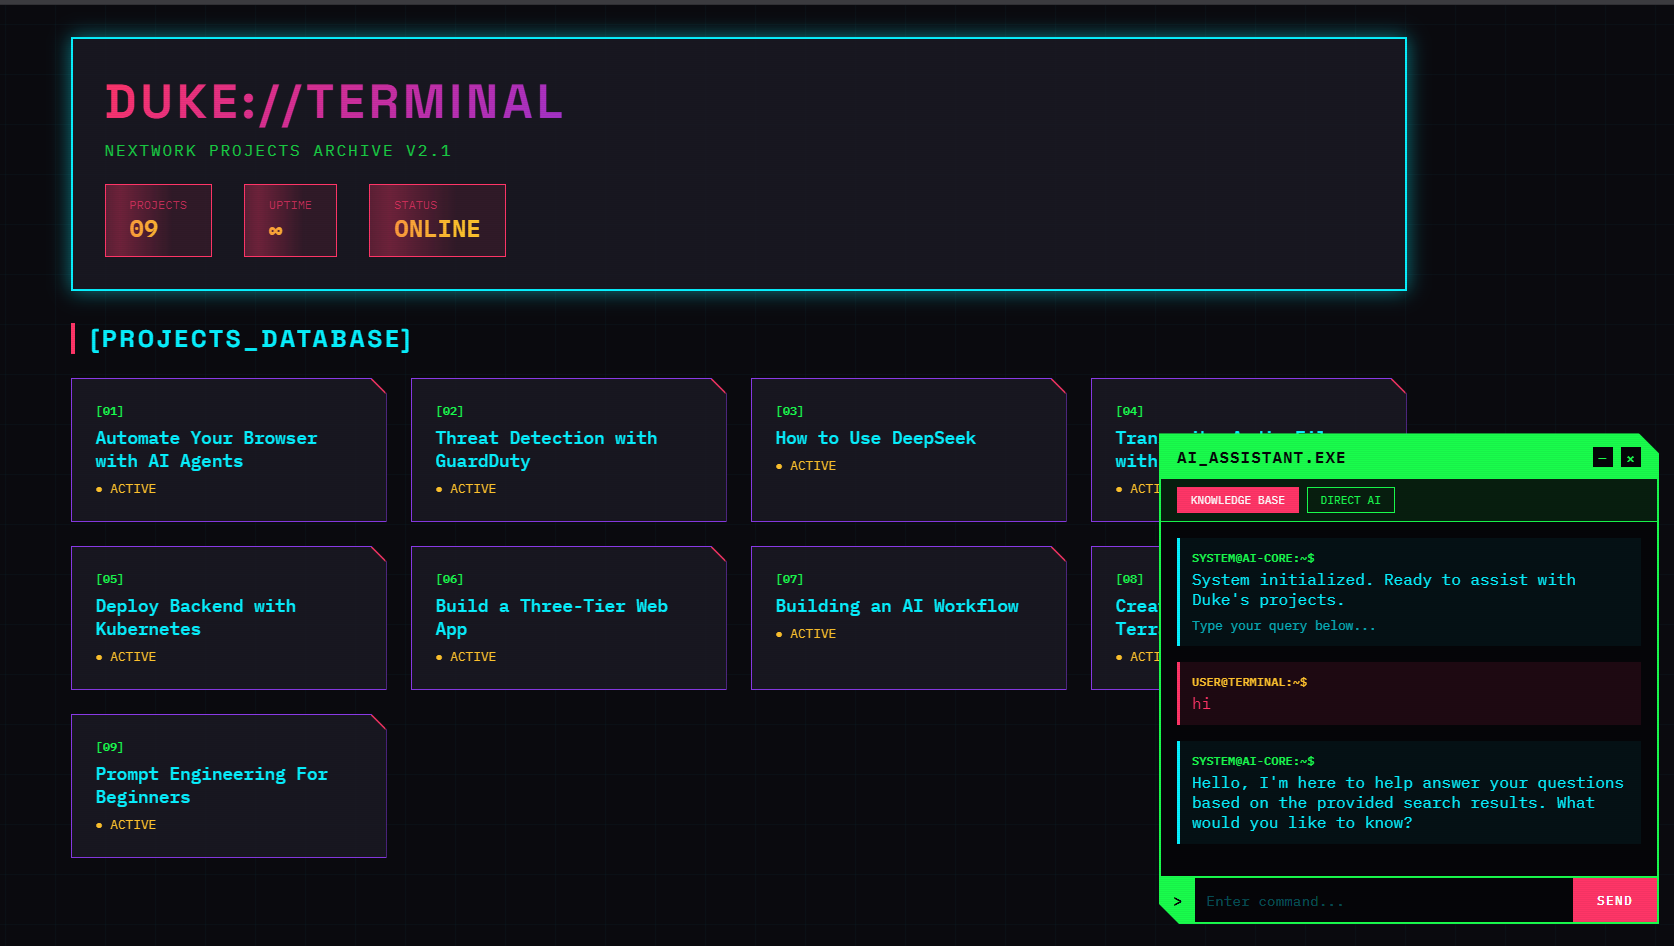
My customized interface now features a retro-futuristic terminal/cyberpunk aesthetic that's totally different from the original. The chat window glows with neon accents and dark backgrounds, pixel fonts make it feel like a vintage computer, and animated effects mimic an old-school terminal. Buttons, borders, and even the message bubbles have a sleek, digital look—giving users the vibe of chatting with an AI straight out of a sci-fi movie. The whole experience feels immersive and visually striking, making chatbot interactions way more fun and memorable.