Extending CI to CD: Artifact Management and Deployment
Overview
In the previous sections, we successfully built the software, ran tests, and analyzed code quality. Now, we will extend our pipeline to:
- Upload Artifacts: Store the built WAR file in a Nexus repository.
- Containerize: Build a Docker image and push it to Amazon ECR.
- Deploy: Automatically deploy the new image to Amazon ECS.
- Notify: Send build status notifications to Slack.
Part 1: Artifact Management with Nexus
What is Nexus?
Nexus is a repository manager that allows you to store and retrieve build artifacts. It acts as a central hub for managing your software packages (WAR, JAR, npm, Docker, etc.).
Setup Prerequisites
Ensure your Jenkins, SonarQube, and Nexus EC2 instances are up and running.
Step 1: Configure Nexus Repository
- Access Nexus in your browser:
http://<nexus-server-ip>:8081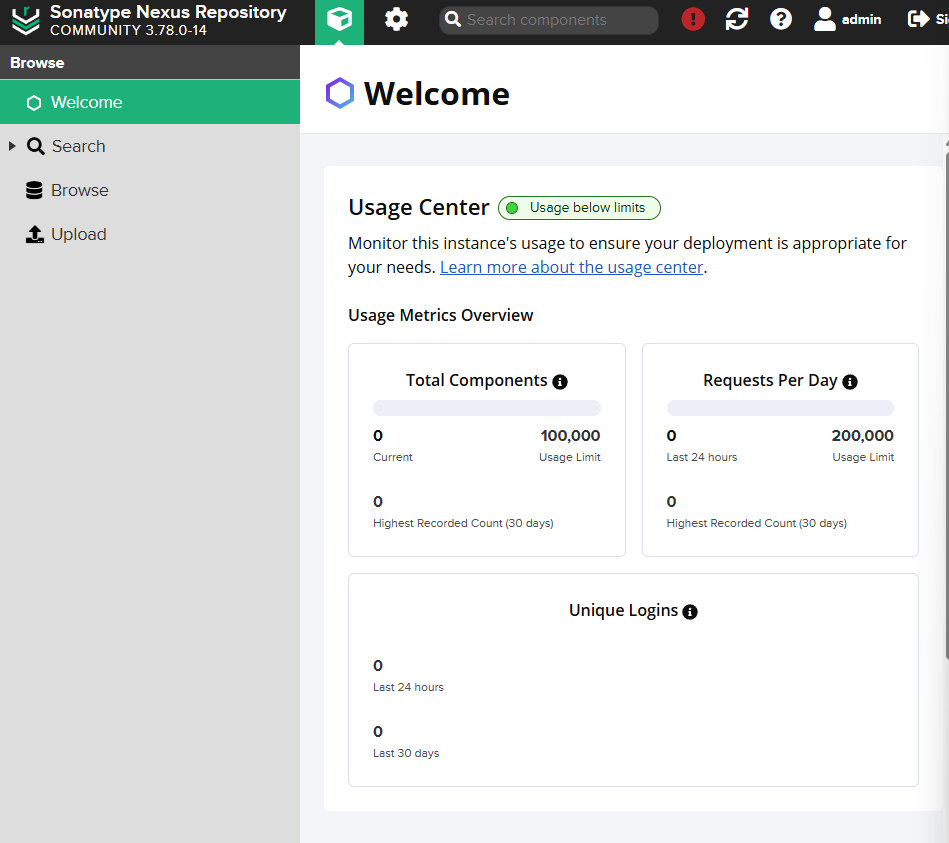
- Log in as admin.
- Go to Server Administration (gear icon) -> Repositories.
- Click Create repository -> Select maven2 (hosted).
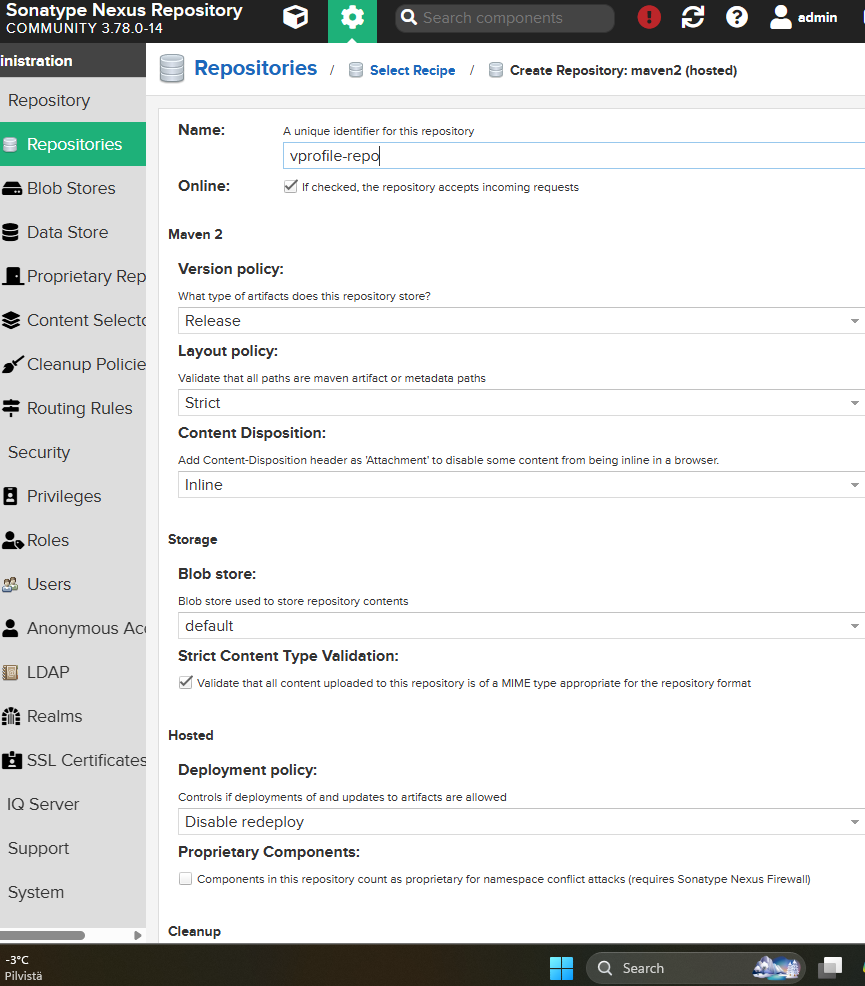
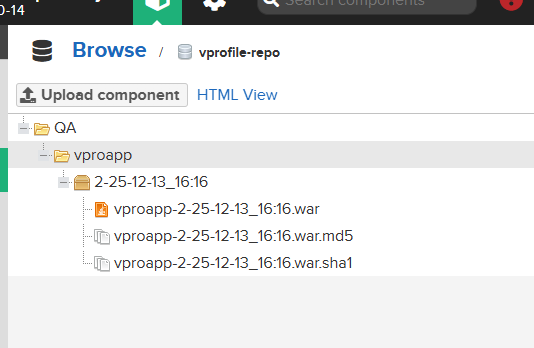
- Name it
vprofile-repoand create it.
Step 2: Configure Jenkins Credentials
- Go to Jenkins Dashboard -> Manage Jenkins -> Manage Credentials.
- Add a new Username with password credential.
- ID:
nexuslogin - Username:
admin - Password:
<your-nexus-password>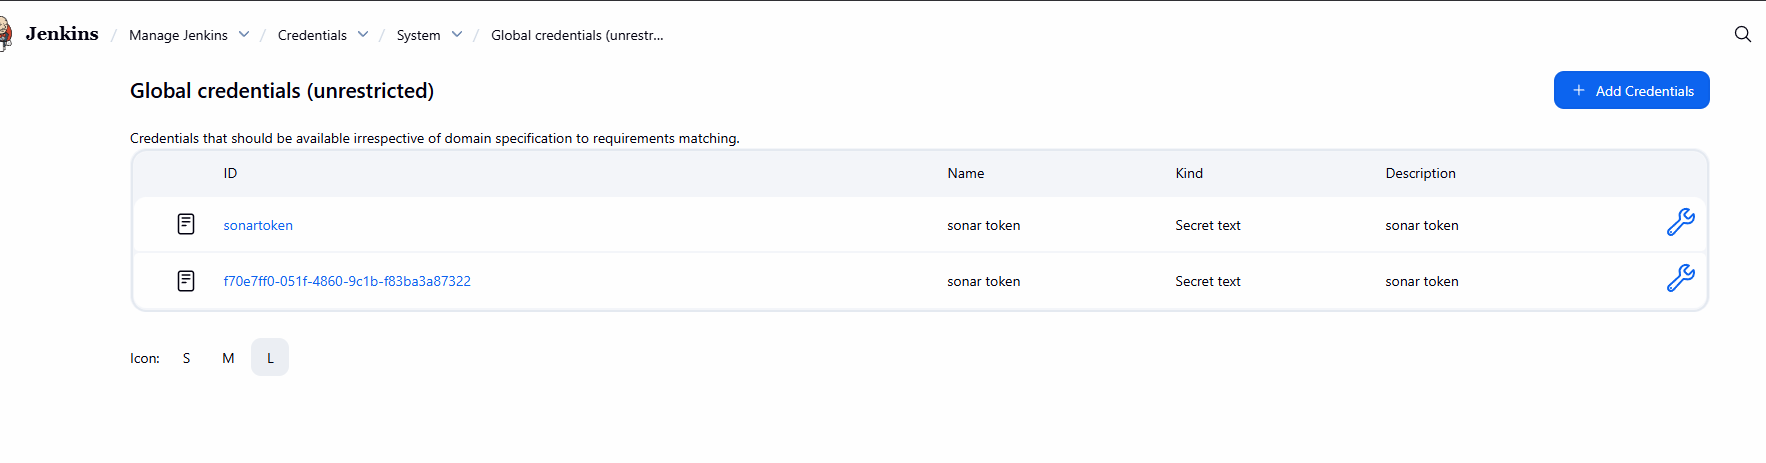
- ID:
Step 3: Update Jenkinsfile for Nexus Upload
Add the Upload artifact stage to your Jenkinsfile. This uses the nexusArtifactUploader step (note the capital 'A').
    stage("Upload artifact") {
        steps {
            nexusArtifactUploader(
                nexusVersion: 'nexus3',
                protocol: 'http',
                nexusUrl: '172.31.8.85:8081', // Use Private IP of Nexus
                groupId: 'QA',
                version: "${env.BUILD_ID}-${env.BUILD_TIMESTAMP}",
                repository: 'vprofile-repo',
                credentialsId: 'nexuslogin',
                artifacts: [
                    [artifactId: 'vproapp',
                    classifier: '',
                    file: 'target/vprofile-v2.war',
                    type: 'war']
                ]
            )
        }
    }
Troubleshooting: Workspace Cleanup
If you encounter issues with disk space or stale files:
- Go to Manage Jenkins -> Nodes.
- Click on the node -> Script Console.
- Run
println "rm -rf *".execute([], new File("/var/lib/jenkins/workspace/")).text(Use with caution!).- Alternatively, SSH into the server and run
rm -rf *inside the workspace directory.
- Alternatively, SSH into the server and run
Verification
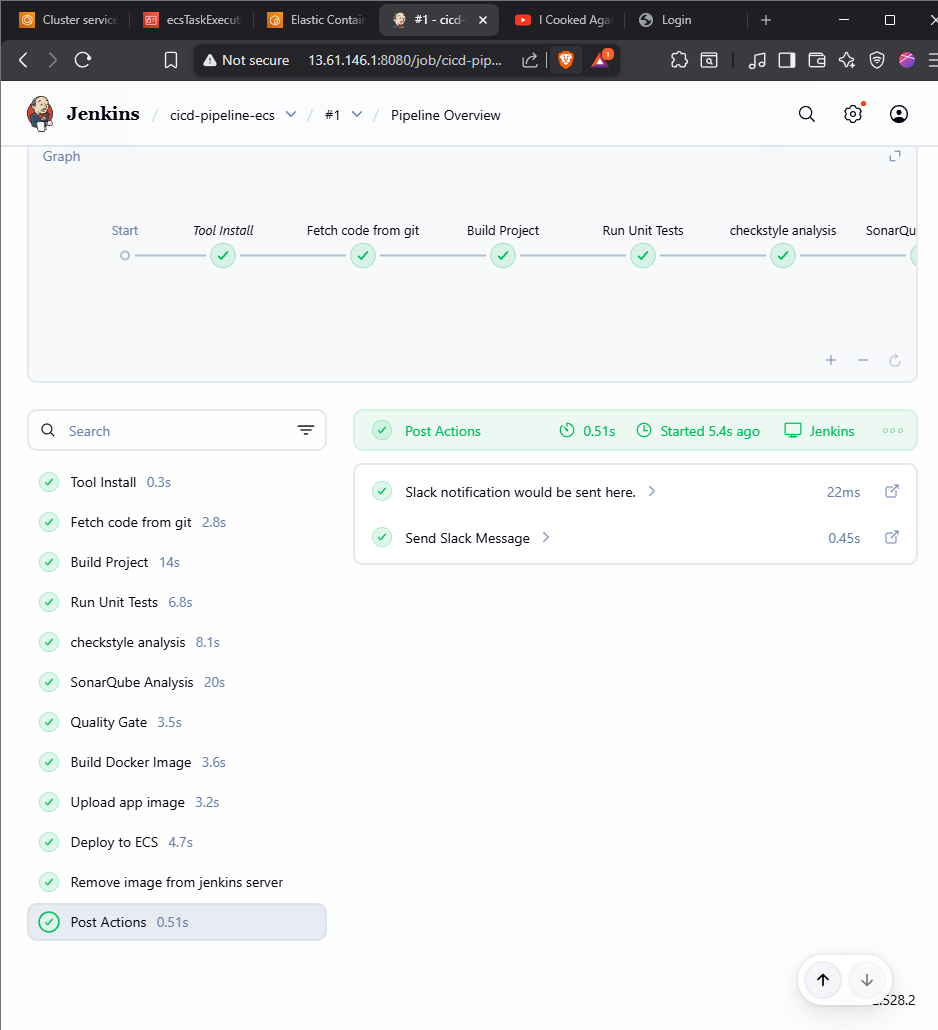
Run the build. If successful, check your Nexus repository to confirm the artifact was uploaded.
Part 2: Slack Notifications
We want to be notified automatically when a build passes or fails.
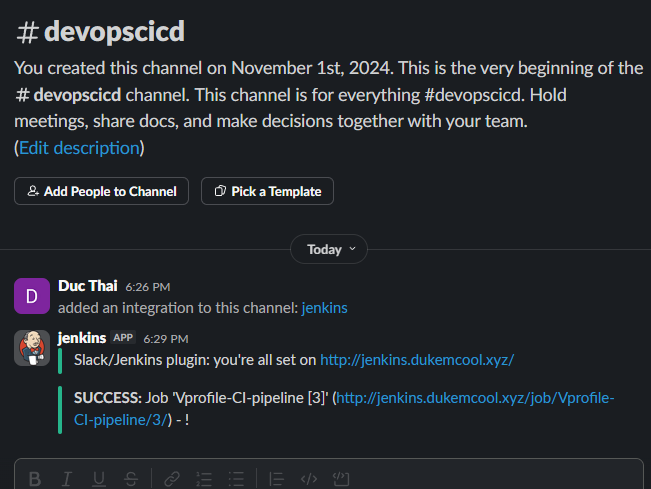
- Install Plugin: Install the "Slack Notification" plugin in Jenkins.
- Configure Slack:
- Create a Slack Workspace (e.g.,
ducthaidevops). - Add the Jenkins CI app to your Slack channel (
#devopscicd). - Get the Integration Token.
- Create a Slack Workspace (e.g.,
- Configure Jenkins:
- Add the token as a Secret text credential in Jenkins (ID:
slack-token). - Go to Manage Jenkins -> System -> Slack.
- Enter Workspace:
ducthaidevopsand Credential:slack-token.
- Add the token as a Secret text credential in Jenkins (ID:
- Update Jenkinsfile: Add a
postblock to send notifications.
def COLOR_MAP = [
    SUCCESS: 'good',
    UNSTABLE: 'yellow',
    FAILURE: 'danger'
]

pipeline {
    // ... existing pipeline ...

    post {
        always {
            echo 'Slack notification would be sent here.'
            slackSend channel: '#devopscicd',
                      color: COLOR_MAP[currentBuild.currentResult],
                      message: "*${currentBuild.currentResult}:* Job '${env.JOB_NAME} [${env.BUILD_NUMBER}]' (${env.BUILD_URL})"
        }
    }
}
Part 3: Docker & ECR Integration
Instead of just storing the WAR file, we will containerize the application and push the image to Amazon Elastic Container Registry (ECR).
Prerequisites
- AWS IAM User: Create a user with
AmazonEC2ContainerRegistryFullAccessandAmazonECS_FullAccess. Create Access Keys. - Jenkins Credentials: Add these keys to Jenkins as AWS Credentials (ID:
awscreds). Install Tools on Jenkins Server:
sudo apt-get update sudo snap install aws-cli --classic sudo apt-get install docker.io -y sudo usermod -aG docker jenkins sudo systemctl restart jenkins- Plugins: Install Docker Pipeline, Amazon ECR, and AWS Steps plugins in Jenkins.
- Create ECR Repo: Create a repository named
vprofileappimagein AWS ECR.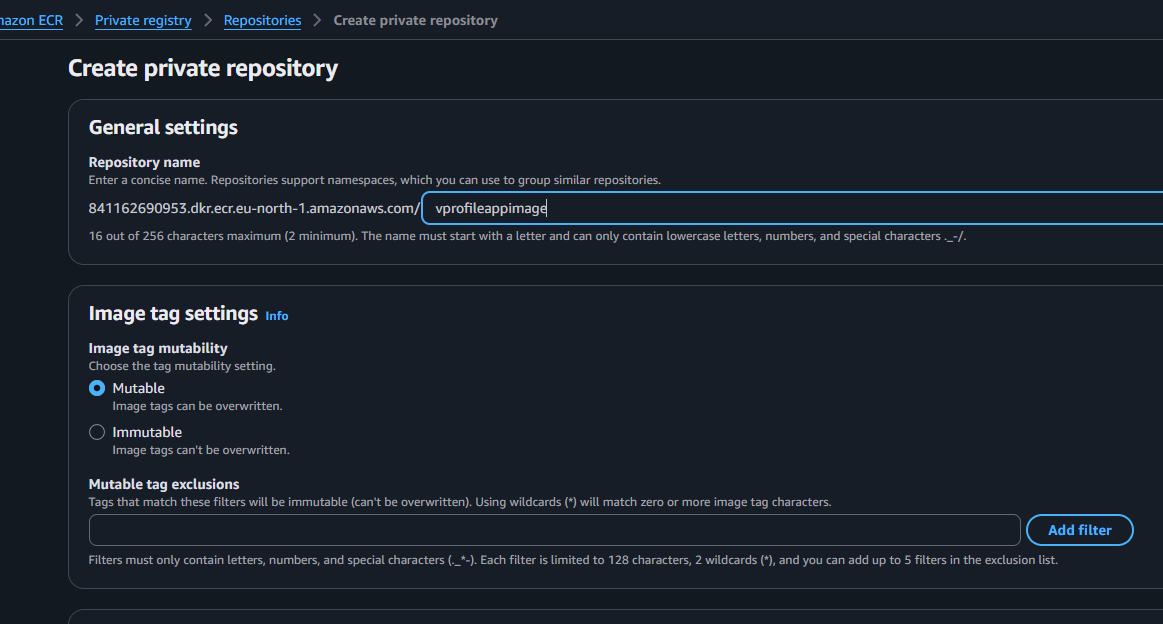
Update Jenkinsfile for Docker Build & Push
Replace the "Upload artifact" stage with Docker stages.
environment {
registryCredentials = 'ecr:eu-north-1:awscreds'
imageName = '841162690953.dkr.ecr.eu-north-1.amazonaws.com/vprofileappimage'
vprofileRegistry = 'https://841162690953.dkr.ecr.eu-north-1.amazonaws.com'
}
stages {
// ... previous stages ...
stage("Build Docker Image") {
steps {
script {
// Build image using the Dockerfile in the repo
dockerImage = docker.build(imageName + ":$BUILD_NUMBER", "./Docker-files/app/multistage/")
}
}
}
stage("Upload app image") {
steps {
script {
docker.withRegistry(vprofileRegistry, registryCredentials) {
dockerImage.push("$BUILD_NUMBER")
dockerImage.push("latest")
}
}
}
}
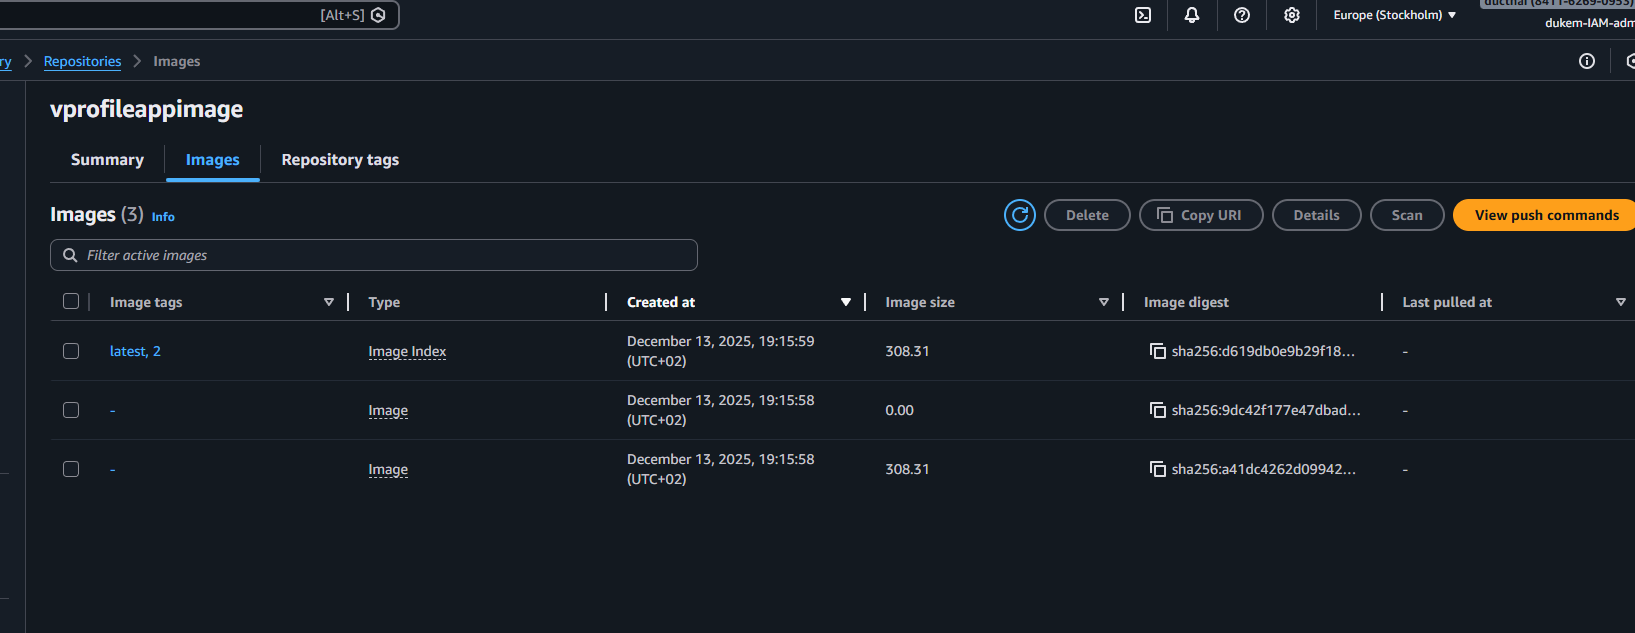
}Run the build. You should see the image in your ECR repository.
Part 4: Continuous Deployment to AWS ECS
Now that our image is in ECR, we will deploy it to Amazon ECS (Elastic Container Service).
ECS Setup
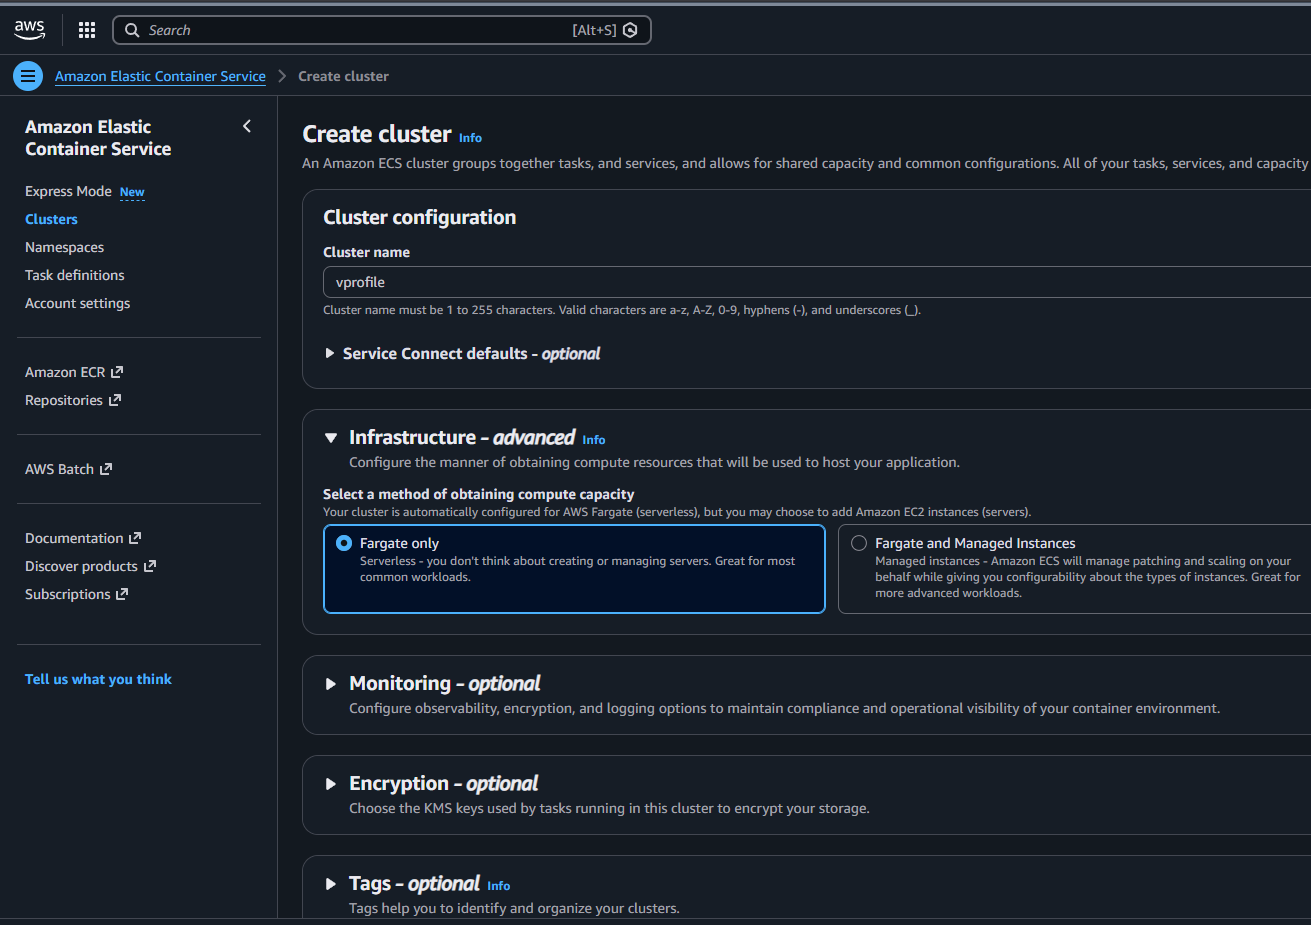
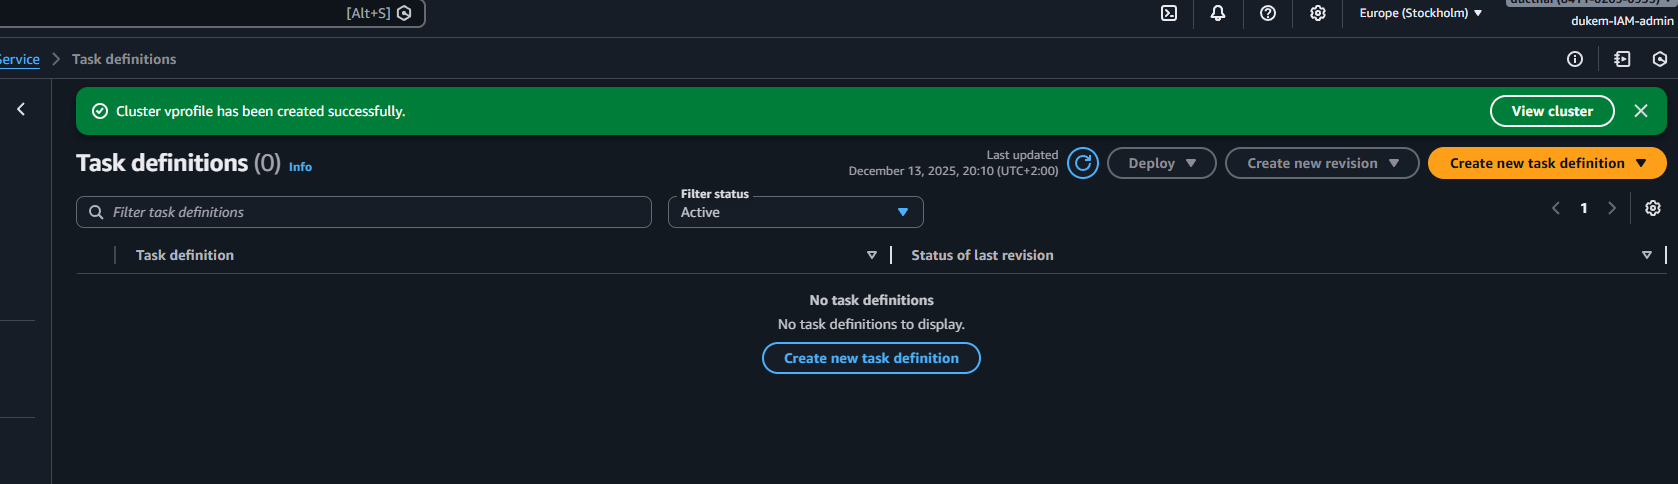
- Create Cluster: Create a generic ECS cluster (Fargate or EC2).
- Task Definition:
- Create a Task Definition.
- Image URI: Use the ECR URI (e.g.,
.../vprofileappimage:latest). - Port Mapping: 8080.
- Role: Ensure the Task Execution Role has permissions to pull from ECR and write to CloudWatch Logs.
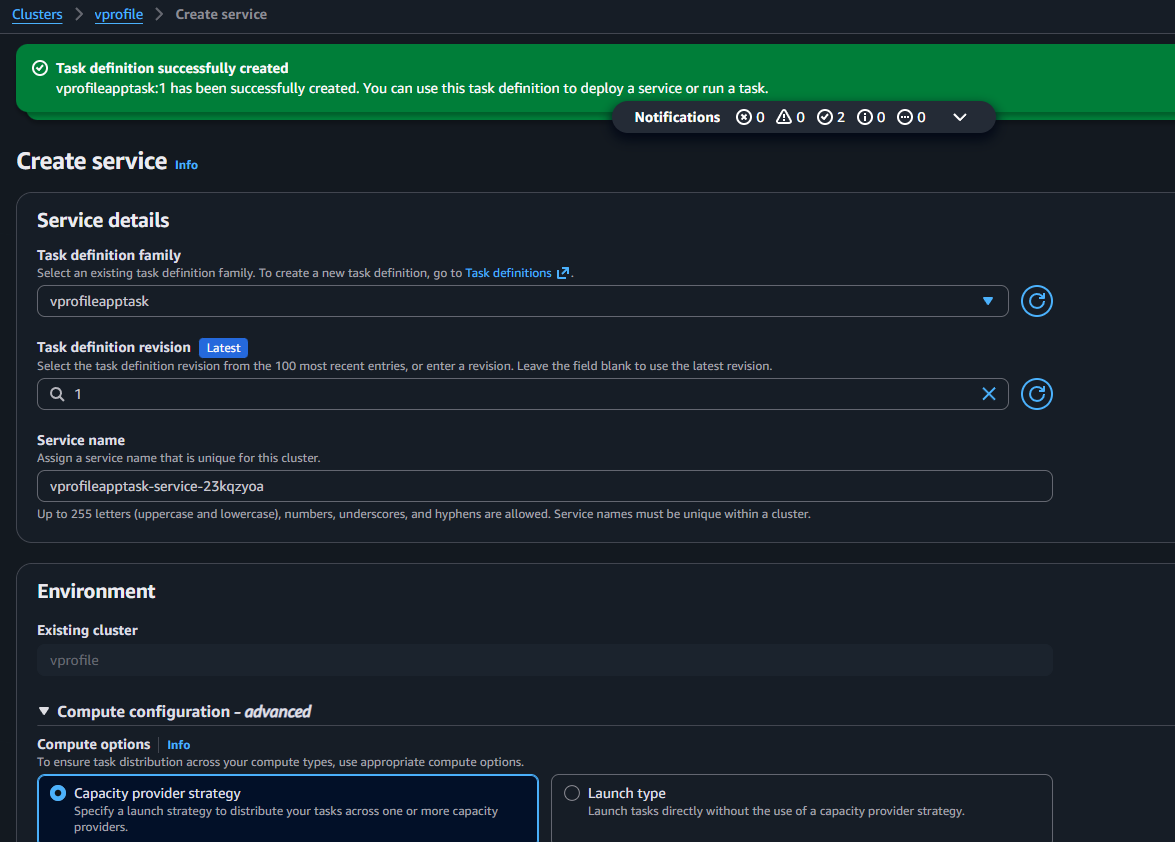
- Create Service:
- Create a Service from the Task Definition.
- Load Balancer: Attach an Application Load Balancer (ALB).
- Security Group: Allow Port 80 (HTTP) from anywhere.
Update Jenkinsfile for Deployment
Add the deployment stage. This command forces ECS to update the service with the latest image.
    environment {
        // ... existing env vars ...
        cluster = "vprofile"
        service = "vprofileappsvc"
    }

    stages {
        // ... previous stages ...

        stage("Deploy to ECS") {
            steps {
                withAWS(credentials: 'awscreds', region: 'eu-north-1') {
                    sh """
                        aws ecs update-service --cluster ${cluster} --service ${service} --force-new-deployment
                    """
                }
            }
        }
    }
Final Workflow
- Developer pushes code to GitHub.
- Jenkins fetches code, builds, tests, and analyzes it.
- Jenkins builds a Docker image and pushes it to ECR.
- Jenkins triggers ECS to update the service.
- ECS pulls the new image and replaces the old containers.
- Slack notifies the team of success/failure.